Showing posts with label handmade soap. Show all posts

Thursday, December 15, 2011

2011 Holiday Count Down # 15

Count down to 2012 - Our gift from FEST to you!

#15 ~ TODAY'S Tutorial By AquarianBath where you will find only the finest selection of soaps and natural herb products!
Today Cory shares: Easy Do It Your Self Soap Mold Making


Take apart wooden soap molds are great for making the perfectly shaped soaps, but they can be quite expensive. For 10 dollars or less you can make a soap mold yourself which is suitable for making professional quality soaps.

Here is what you will need to make a mold that will make 14-15 4.5 oz bar soaps to fit into standard soap boxes:

Sandpaper
Rotary saw
Power drill
1 natural board 3.5 inch wide X 1.5 inch thick X 27.5 inches or longer
1 natural board 5.5 inch wide X 1.5 inch thick X 35 inches or longer
2 six inch bolts with 1/4 inch diameter. The tip of the the bolt should be threaded at least an inch.
1/4 inch drill bit
4 1/4 inch washers
2 1/4 inch wing nuts


The first board forms the base of the mold and ends of the loaf. Measure and mark a length of the board 17.5 inches and 2 lengths 4.5 inches. The second board forms the sides of the mold. Measure and mark two lengths of the board to 17.5 inches. Cut and sand the rough edges of the boards. Next you will need to drill holes for the bolts that hold the mold together. Two bolt holes need to be made in two corners of the each board. Stack the 2 matching 17.5 inch boards on top of each other. Near one corner of the top board measure inward from the long side of the approximately 2 inches then measure from the short end 1 inch out. Mark this spot with a dot. Make a dot on the opposite end of the long side of the board. Drill the through these markings keeping both boards stacked securely together. Sand around the newly drilled holes. Next thread your bolt and washers and wing nut through the two boards. You are ready to assemble the mold. The narrow long board goes at the bottom in between the bolted side boards that secure it. The 2 short end boards stand up in between the sides of the board and are secured by the bolt which sits behind it. Be sure to line your soap with wax paper before use.


Cory Trusty is a community herbalist and Soap maker in Daytona Beach, Florida.
Visit her one Etsy at AquarianBath or DelicateAdornments. You can also find her on Facebook.

Thursday, August 11, 2011

How to Cure Soap in Humid Environments

Florida's climate can be a bit of challenge to the handmade soap maker. Depending on the concentration of water that a soap is made with it requires 3-6 to cure, or become ready for use. For standard beginner recipes 4 weeks is required. While the soaps cure they become milder and loose water; that is if you are in Florida, you hope they loose water. In Florida summer months the humidity can be quite a challenge for curing soaps and the over all shelf life of your soaps. Over the years I have had some sad losses due to Florida's humidity. If soaps are left out to cure in humid rooms the excess water from the soaps will not evaporate, they will simply stay in the soaps and lead to premature rancidity. In addition to the off smell characteristic of rancidity, rancid soaps will also develop small orange spots from oxidation.


You can offset the humidity somewhat with a dehumidifier, but dehumidifiers can heat up and be expensive to run. Also logistically it maybe difficult to use a dehumidifier depending on the size of your curing area, the type of electrical outlet in your curing area, etc. Also older central air conditioning unit are not designed to dehumidify.

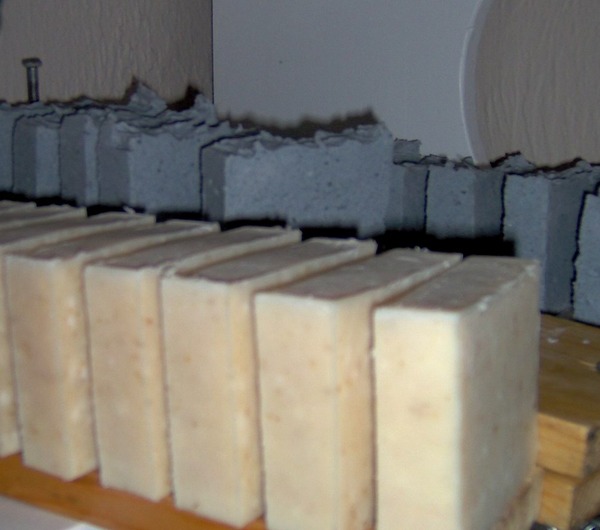
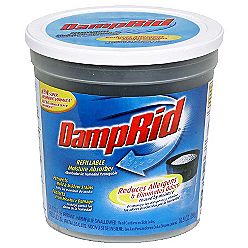
Now I rarely run my dehumidifier, but instead cure my cut soaps in small closed spaces with non-toxic Calcium Cloride desiccating salts. The most readily accessible salts are sold as Damp Rid. You can at most grocery stores or online.


A cabinet or a large cardboard box makes a good place for curing your soaps using this method. If you are using a small container of Damprid, you will want to check your container every couple days for the first week or so in case you need to add more. Also, take into consideration what kinds of soaps you are curing together if you are using more than one variety. You don't want to cure soaps with a delicate floral scents together with woody scents, for example. Unscented soaps can pick up scents from scented soaps that they are cured with when you use this method. Right now, I'm curing my strongly medicinal smelling Neem Shampoo Bars in their own dedicated box away from my regular soaps for this reason.


Hope you like this method. Let me know if you have any questions or experiences curing soaps in humid environments.

Enjoy,
Cory Trusty

http://aquarianbath.etsy.com

Sunday, April 4, 2010

It's FEST BLOG GIVEAWAY Time for APRIL!


April brings another great GIVEAWAY highlighting the talents of our Florida Etsy Team members. Our Giveaway was the Etsy FEST November Team Challenge winner and is offered by Cory of AquarianBath .

This luxurious, handmade pumpkin poppy seed soap is 100% veggie oil made with garden fresh Seminole pumpkin puree and a blend of essential oils including Ginger, sweet orange and patchouli. It whips up into a rich and creamy lather. Many of Cory's soaps are vegan friendly and this one has a rich and creamy lather. Hummm - lush and lovely!


HOW TO ENTER: Enter to win this fabulous soap by visiting Cory at her Etsy Shop AquarianBath or any of the FEST Team members listed to the left on this page. Find your favorite item, share it with us and tell us why you love it. Remember to provide your contact information so we can connect with you if you are the Winner! Winner will be picked on 04/30/10.